Subscribe For Free Updates!

We'll not spam mate! We promise.

Tuesday, 27 June 2017

How to Block WiFi Users on TP-Link Router - Wireless MAC Filtering

Hi Users, In this post, Today I'm going to show you How to Block WiFi Users on Any Router ? You can Block unwanted users who's connected to your WiFi network. Block unwanted users from using your WiFi on TP-Link router or any other router. If someone got your WiFi password or Hacked into your WiFi network then just copy MAC address of the user and save it in Wireless MAC filtering and enable this option after that the user unable to get access to your WiFi even if he/she knows your WiFi password.

Steps to Block WiFi Users or Devices:

  1. Login to your TP-Link Router Control Panel.
  2. It asks for Username and Password. The default Username and Password are both admin in lowercase. Type the username and password and click on Login.
  3. Click on Wireless Tab on Left Side bar. To check Number of Users connected to your Wireless Network click on Wireless Statistics.
  4. Copy or Note Down the MAC Address of the User which you want to Block.
  5. Now Click on Wireless MAC Filtering tab.
  6. Click Add button and Paste or Type the MAC Address, Description and make Status Enable.
  7. Finally Click on Save button and you are done.
Repeat the above steps to Block more and more users.

Video Tutorial


Wednesday, 30 November 2016

How to Create a Bootable USB Pen Drive - Universal USB Installer


In this post I'm going to show you How to Create a Bootable USB Pen Drive ? If you are tired of creating Bootable CDs and DVDs on which using  multiple times got scratched and then you have to create a new bootable disc which waste your time and costly for you. Then install or setup Windows from USB Flash Drive which doesn't waste your time, loss of money and no fear of being scratched. Now every one using this method. It is the best way to install or setup Windows Operating System.

Steps to Create a Bootable USB Flash Drive:


1.   Download and Open Universal USB Installer [Download Link- https://www.pendrivelinux.com/universal-usb-installer-easy-as-1-2-3/]

2.   Select a Operating System Installer from the dropdown to put on your USB.

3.   Browse the .iso file.

4.   Select your USB Flash Drive Letter Only from the dropdown menu. If you want to Format the Pen Drive then tick the box

5.   Now click on create button and then click on Yes to continue.

      Wait Until progress done.

Video Tutorial


Saturday, 4 April 2015

Avast Premier and Internet Security 2015 License Key till 2050

Avast security software products are developed for Microsoft Window, Mac OS X, Linux and Android users. It releases security programs for personal and commercial use. AVAST stands for Anti-Virus - Advanced Set. It is developed by Avast and ALWIL software.The Most Trusted Security Program over 220 million people choose AVAST to keep them safe online more than any security company. Avast! is the most trusted name in the Antivirus industry. The Avast products available in 45 languages.

Products

  • Avast Free Antivirus 2015
  • Avast Pro Antivirus 2015
  • Avast Internet Security 2015
  • Avast Premier 2015
All above products can be Licensed through this Tutorial

Products for Android

  • Avast Mobile Security & Antivirus
  • Avast Mobile Premium
  • Avast Anti-Theft

How to Activate License File ?

Automatic Method

1. Install Avast Premier or Internet Security or Pro Antivirus as 30-Days Trail mode.

2. Start your computer in Safe Mode.

3. XP users please double click [AVAST XP ZeNiX.reg] to activate my 2050.

4. Run [Avast License ZeNiX 2014-03-14.exe],
    Enter Password: ZeNiX

5. Reboot

Manual Method

1. Rename [ZeNiX.dll] to Version.dll

2. Copy Version.dll to these folders

  c:\Program Files\AVAST Software\Avast\
  c:\Program Files\AVAST Software\Avast\Setup

3. Delete Userenv.dll from above folers, if you find any.

4. Reboot
SCREENSHOTS


[ Avast All Products 2015 License File till 2050 ]


Watch Video Tutorial

Saturday, 28 March 2015

How to Play Android Games on PC & Mac 2015


Today, many people in this generation has its own Android phone. Enhancing features of the Android phones being the way that he has taken on the smartphone market. Google Play Store provides many apps and games which makes your Android phone more entertaining and highly productive device. Suppose you might not own an Android mobile but want to play an awesome game that you played on your friend’s mobile.Or you wanted to test apps before installing it on your device? Or is your child always playing games on mobile for hours together draining the battery? Then this article is for you !

I'm going to tell you how to get the Android environment on your computer. So, that you can play it on your computer without an Android phone.

Steps

1.  First Start off by downloading BlueStacks - http://www.bluestacks.com - It's a free program and works on both Mac and Windows. This program is used to run Android environment on your computer.


2.  Installation: For Windows users, it should be a small file (around 20 MB) which you open up and later downloaded packages automatically and that's good. Mac users, it should be a 100 MB .dmg file which you will need to mount and drag the .app file to your preferred location on your computer.
Note: If you are unable to install online then download offline installer - Download Click Here


3.  After Installation open up BlueStacks. It take some time for first load, but it will not get more time later you open up.


4.  Install your desired .Apk file which you want to run in your Android environment.


Enjoy...!

Thanks for Reading this Article!

Watch Video Tutorial


Friday, 27 March 2015

Create Password Protected Folder without Any Software


Today I will show you an amazing and interesting trick to Create password protected Folder without using any extra cost software for all Windows platform. It is very easy to do you have to simply enter or paste coding in Notepad which is below in this post. It works in all Windows platform. Follow these simple steps to learn this trick.

Steps to Create Password Protected Folder:

  1. Open Notepad and Copy given below code into it.
    cls
    @echo off
    title Folder Locker
    IF EXIST "Control Panel.{21EC2020-3AEA-1069-A2DD-08002B303­­­09D}" GOTO UNLOCK
    IF NOT EXIST Locker GOTO MDLOCKER
    echo Folder Created.
    :CONFIRM
    echo Are you sure you want to lock the folder? (Y/N)
    set/p "cho="
    IF %cho%==Y GOTO LOCK
    IF %cho%==y GOTO LOCK
    IF %cho%==N GOTO END
    IF %cho%==n GOTO END
    echo Invalid Choice.
    GOTO CONFIRM
    :LOCK
    ren Locker "Control Panel.{21EC2020-3AEA-1069-A2DD-08002B303­­­09D}"
    attrib +h +s "Control Panel.{21EC2020-3AEA-1069-A2DD-08002B303­­­09D}"
    echo Folder Locked.
    GOTO END

    :UNLOCK
    echo Enter password to unlock the Folder :
    set/p "pass="
    IF NOT %pass% == pchacks GOTO FAIL
    attrib -h -s "Control Panel.{21EC2020-3AEA-1069-A2DD-08002B303­­­09D}"
    ren "Control Panel.{21EC2020-3AEA-1069-A2DD-08002B303­­­09D}" LOCK
    echo Folder Unlocked Successfully.
    GOTO END
    :FAIL
    echo Invalid Password!
    GOTO END

    :MDLOCKER
    md Locker
    echo Folder created.

    GOTO END
    :END
    PAUSE
  2. Save the Notepad as locker.bat (.bat is necessary)
  3. Now open locker.bat file and press any key to continue. For first time a New Folder will be created with name Locker
  4. Copy the data which you want to protect to the Locker folder.
  5. Now double click locker.bat file and when command prompt appears type Y and press Enter.
  6. Now Locker folder will be hidden from your view, to access that folder double click on locker.bat
  7. It will ask for password enter the password and done. (Default password is pchacks)
 Note: To change the password replace pchacks with your own password in the above code.

How to keep Secure your Folder ?

You might be thinking that anyone can access the password by opening that locker.bat file in Notepad or any other text editor. To make it more secure hide locker.bat in some secure location after following the above steps. To access the secured file double click on locker.bat. I would suggest copying locker.bat file into Pendrive and copying it into your computer whenever you required to access to your protected files.

Enjoy...

Thanks for Reading

See this Video Tutorial


How to Download Android Apps on PC from Google Play Store [Latest]


Google Play Store has available many cool features which have millions and millions free games and apps. You can directly download play store apps from your android mobile but the main problem is you cannot download play store app and game directly on your PC. When you install any app and game on PC from Google Play Store it says you don't have android devices. If your android phone will not have internet in it you won't be able to download the app from Play Store. If you want to download android apps and game from Play Store on PC you will need to have internet. Now I'm here with the tricks to download android apps directly from Google Play Store to your PC. Follow the below steps to download android apps in just 1-click.

Steps to download Android Apps on Pc from Play Store:

  1. First open any app (apk file) which you want to download from Play Store.
  2. Copy the URL or Package Name of the app (apk file).

  3. Now Go to - http://apps.evozi.com/apk-downloader/

  4. Paste the URL or Package Name in "Package Name or Google Play URL" box.
     
  5. Click on 'Generate Download Link' wait few seconds and the download link will be generated.

  6. Click on Download Link and Enjoy...!

Note: We recommend you to use download manager such as Internet Download Manager (IDM) for better speed. You can download it full version from here Click Here

Video Tutorial on How to Download Android Apps on PC from Google Play Store


Friday, 5 September 2014

How to create animations using Frame by Frame Method in Macromedia Flash

Flash is used mainly to create animations for the web page. Animation is nothing else but a collection of still images. These images are displayed so quickly in a sequence that they give you the illusion of motion. Each image in Flash is called a frame. These frames are represented as the small rectangular cells in the Timeline.


Creating Animations Using Frame-by-Frame Method

  1. Create the object on the stage to be animated. The Timeline just to the right of Layer 1 shows the first key frame dot.


  2. Insert a new key frame. Click Key frame option in the sub menu of Timeline option in insert menu or press F6. A new key frame will appear in the Timeline with a copy of object.


  3. Now, select the next key frame by clicking on it and move the object slightly to change its position.


  4. Continue to insert one frame at a time and every time by selecting that frame change the position of the object. Make it sure while moving the object that the new frame is selected.
  5. The animation can be played by clicking Play option in the Control menu.
  6. To see how it will be viewed on the web page click Test Movie option in the Control menu.
If you are facing problem. Please drop your problem in below comment box.

Thursday, 4 September 2014

How to Make an Invisible Folder in Windows

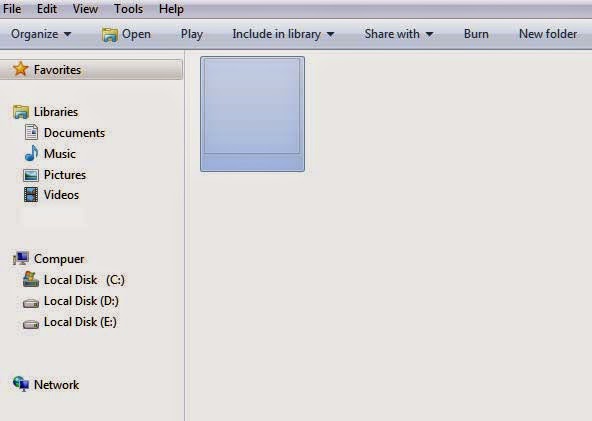
In windows operating system already have a function to hide a folder. It makes the folder to completely hide. But making folder invisible is a lot of fun. You can easily hide a folder without buying any high cost software's. Read this complete article so that you can know how to make a folder invisible.


Steps to Make a Folder Invisible :

  1. Right-click on any area on desktop where you would like to create the folder. Point to New and     then click 'Folder'.

  2. Right-click on 'New Folder' and click 'Customize' tab and then Click on Change Icon option. Scroll right until you find an empty space, then select it and then click OK. This will make your folder invisible but you can still see the text there.


  3. Press F2 or right click and select Rename. Hold Alt button and press 255 number. After that you will see a blank space between there.


If you correctly apply all those steps then you will able to create Invisible Folder. In this easy way you can hide your files in Invisible Folder.